
#MRDCAPERODD Reveal Time - Kitchen, Entry, & Living Room!!!
Well it’s FINALLY that time! Are you ready for the #mrdcaperodd phot tour?! At least part 1 today! Some context if you haven’t followed this project from the beginning. In the early dog days of covid, I asked my parents if they’d want to go in on a cape house together. We hadn’t seen each other in about 6 months, the longest it had ever been, and thought it would be nice to have place we could all visit together. They said yes and fast forward to the end of October 2020 we closed on a very ugly house on Cape Cod! It needed everything - as in full gut - but I zeroed in on this house for two reasons - the location was great and while the floor plan made NO sense, it could be reconfigured to work really well without the need for an addition.
Not terrible from the exterior although we have future plan to get rid of those skylights and extend the porch! Oh and sources will be listed at the end. :)

Because we did so much rearranging, I thought I’d share the original floor plans and the changes. There were three bedrooms on the first floor and two upstairs. These were the main issues:
the kitchen was closed off from the rest of the house
the eating area was in the middle of a walkway from the front of the house to the back
the garage was slapped onto the side of the house but there was no way to get in the house without walking around outside to the front door
there was no mudroom
the laundry room was in the main bedroom
there was a very strange tiny room next to one of the bedrooms called the “media room”

1ST FLOOR

2ND FLOOR
The 2nd floor plan doesn’t show it but there is also an existing bathroom attached to the left bedroom creating a main suite upstairs as well. That bathroom ended up being the only space we didn’t touch in the renovation! Generally the second floor was great. We tweaked the middle bathroom a bit to create a larger shower and removed the hall closet to add that space to the bathroom.
The 1st floor is where the bulk of the work took place. We were lucky that the giant living room and office were recently added on - it made the house. Here is how we reconfigured the 1st floor to work for us.

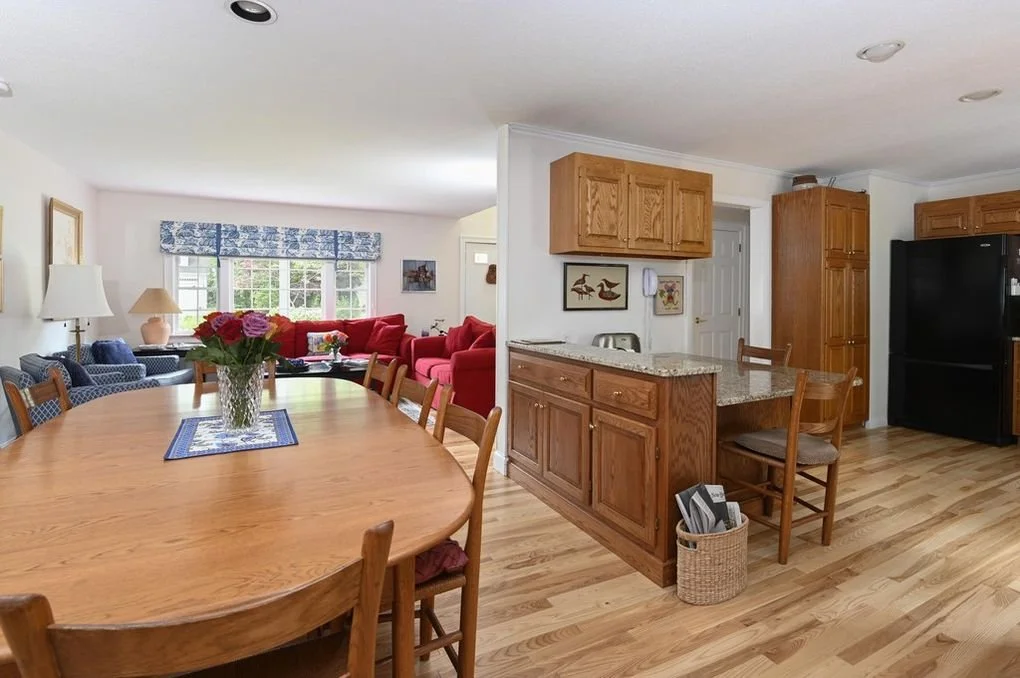
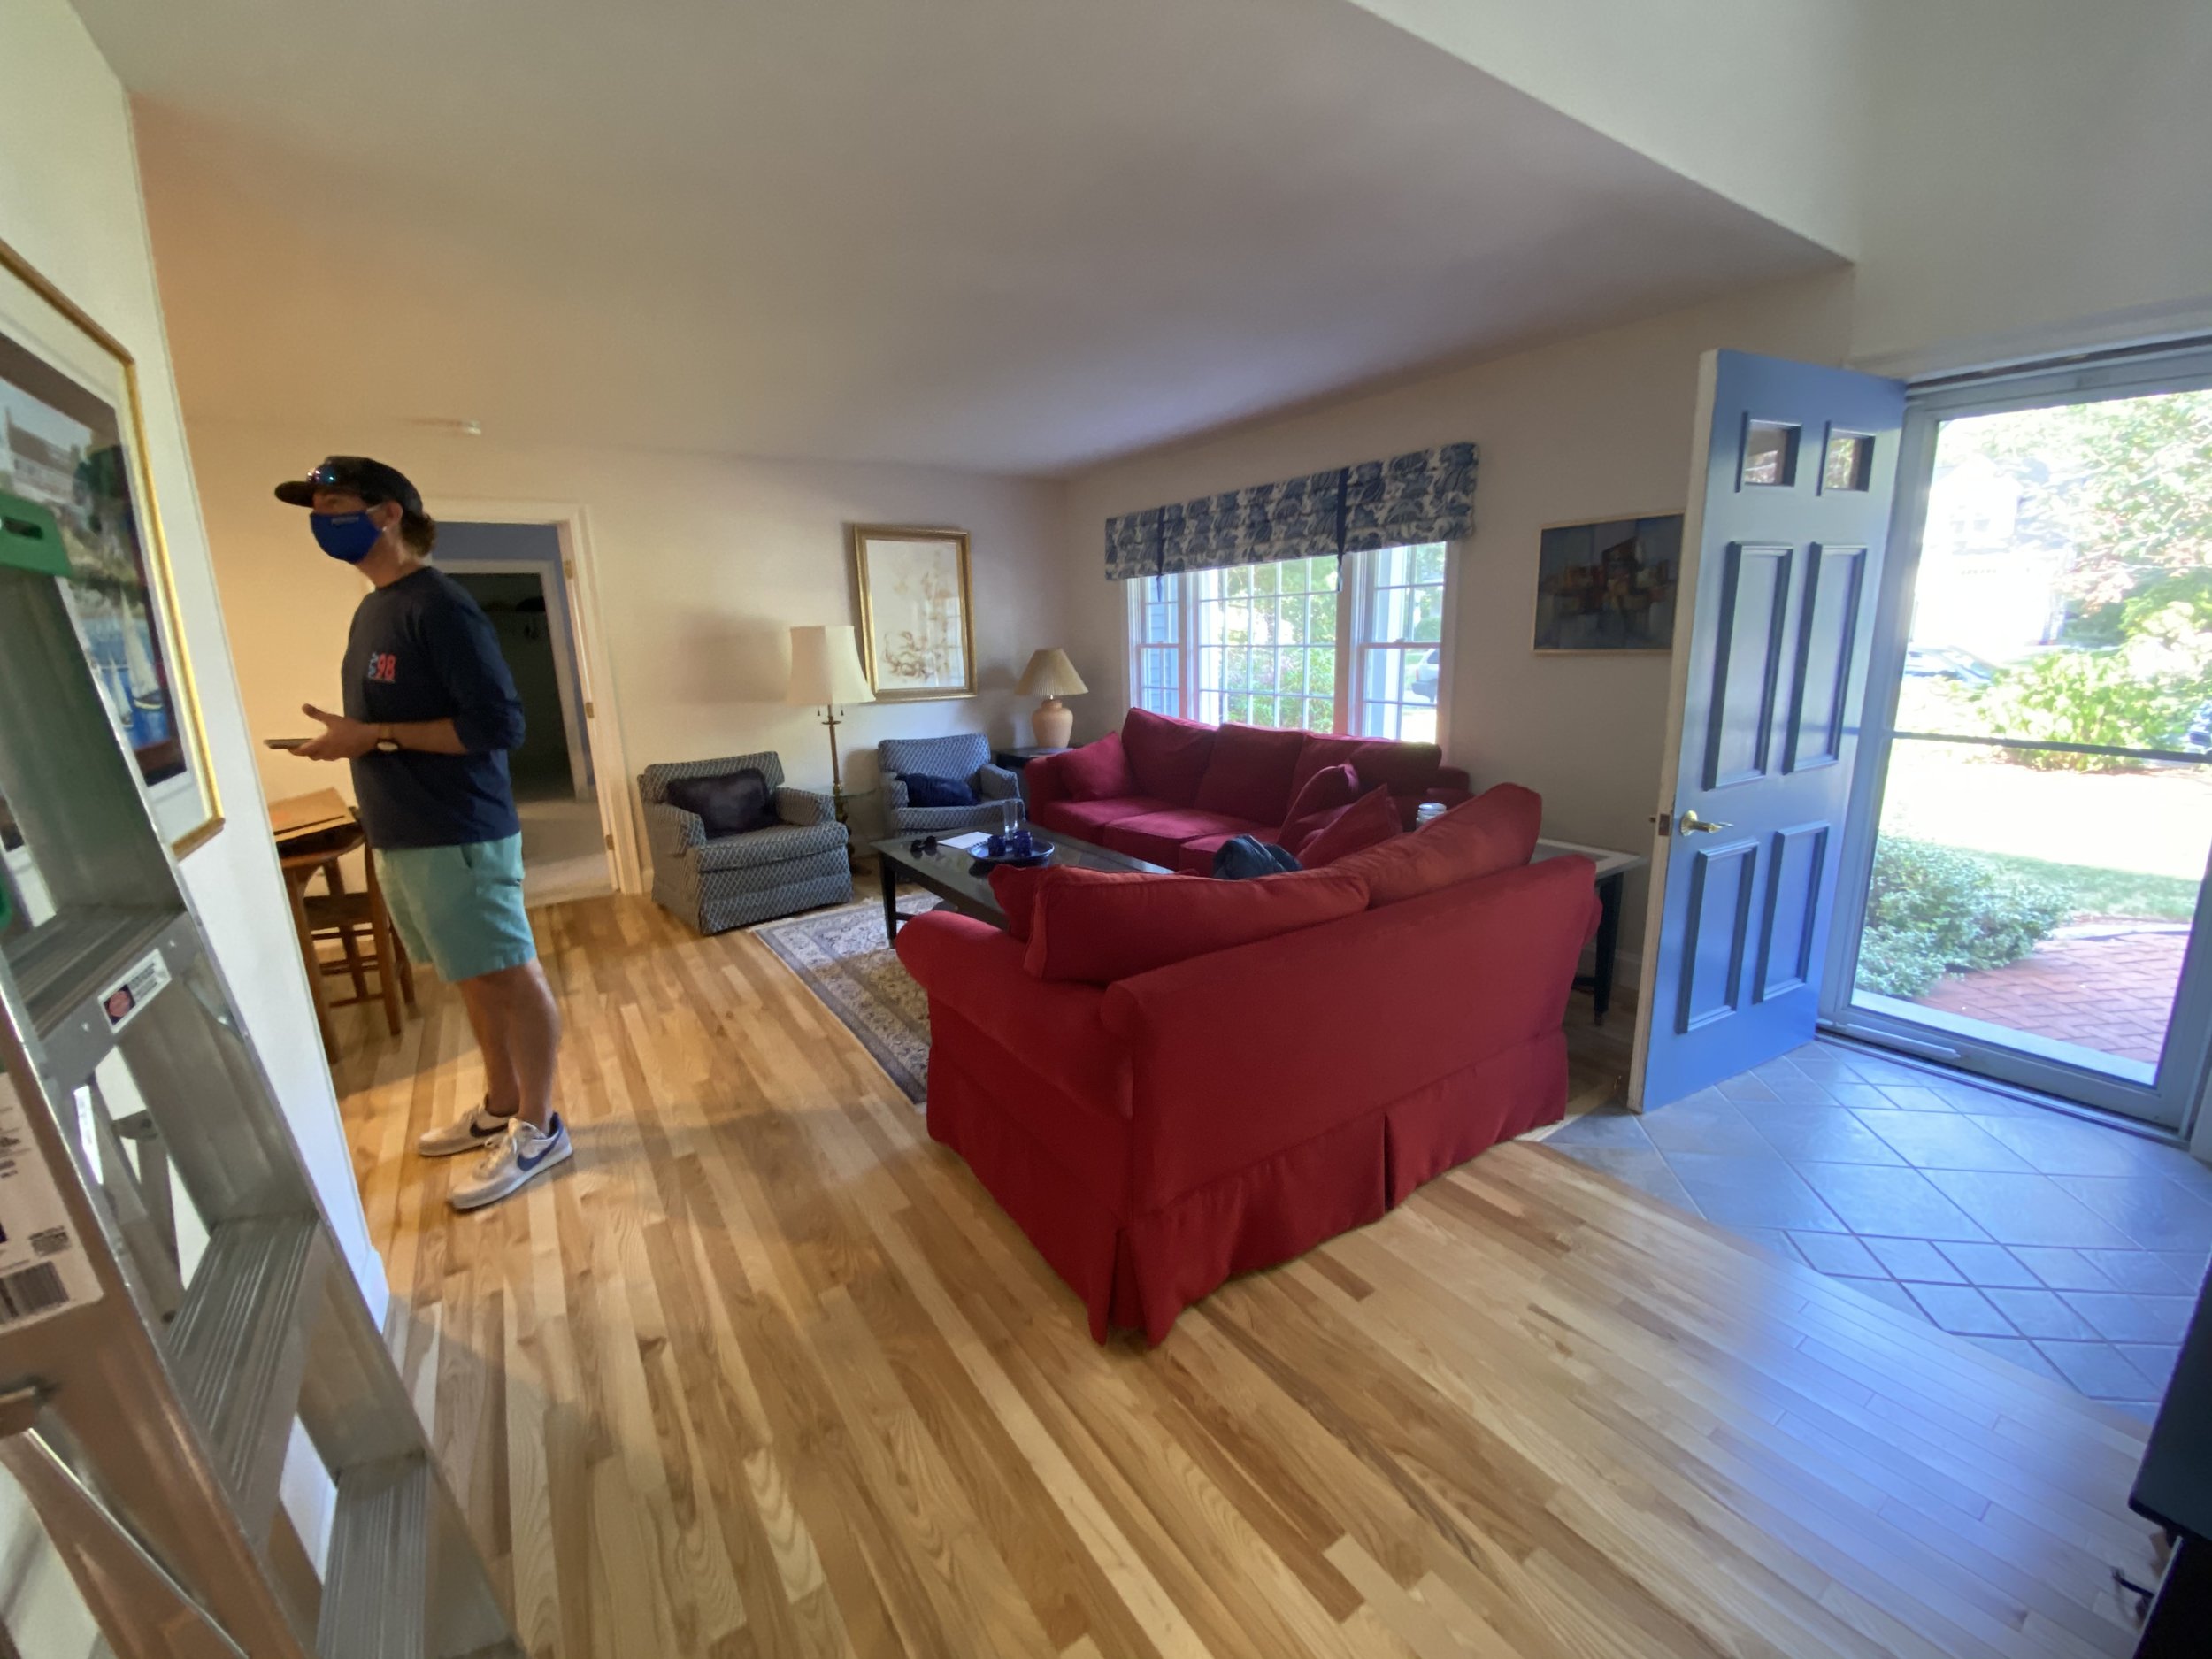
Ok so wanna see some befores? These photos make it look better than it was in reality. When Mr. R walked in for the first time (we bought it before he saw it in person), he declared that he wouldn’t be sleeping there ever lol! Even our realtor, who is the nicest woman, said it was a dump! I’ll start with the kitchen which we almost left for phase II but I’m so glad we didn’t. When they pulled out the dishwasher there was black mold and rot all behind. Gag.

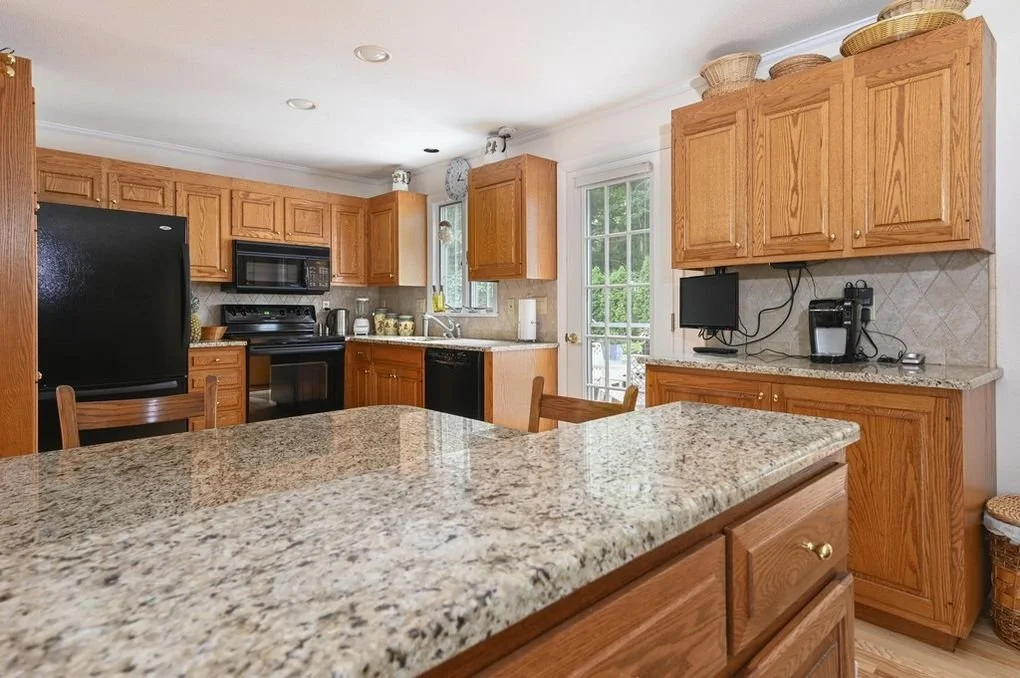
Apart from the kitchen being aesthetically and functionally terrible, it also had a big hump in the floor which turned out to be a structural issue where the floor wasn’t properly supported below in the basement. We also found out that the second floor was being held up by a first floor wall that also had no support in the basement. Excellent construction. So the first thing we did was bring in LVLs and add lally columns so that structurally everything was sound.
After all of that not-fun stuff was out of the way, we removed the wall between the kitchen and the front living room and had the open floor plan we loved.
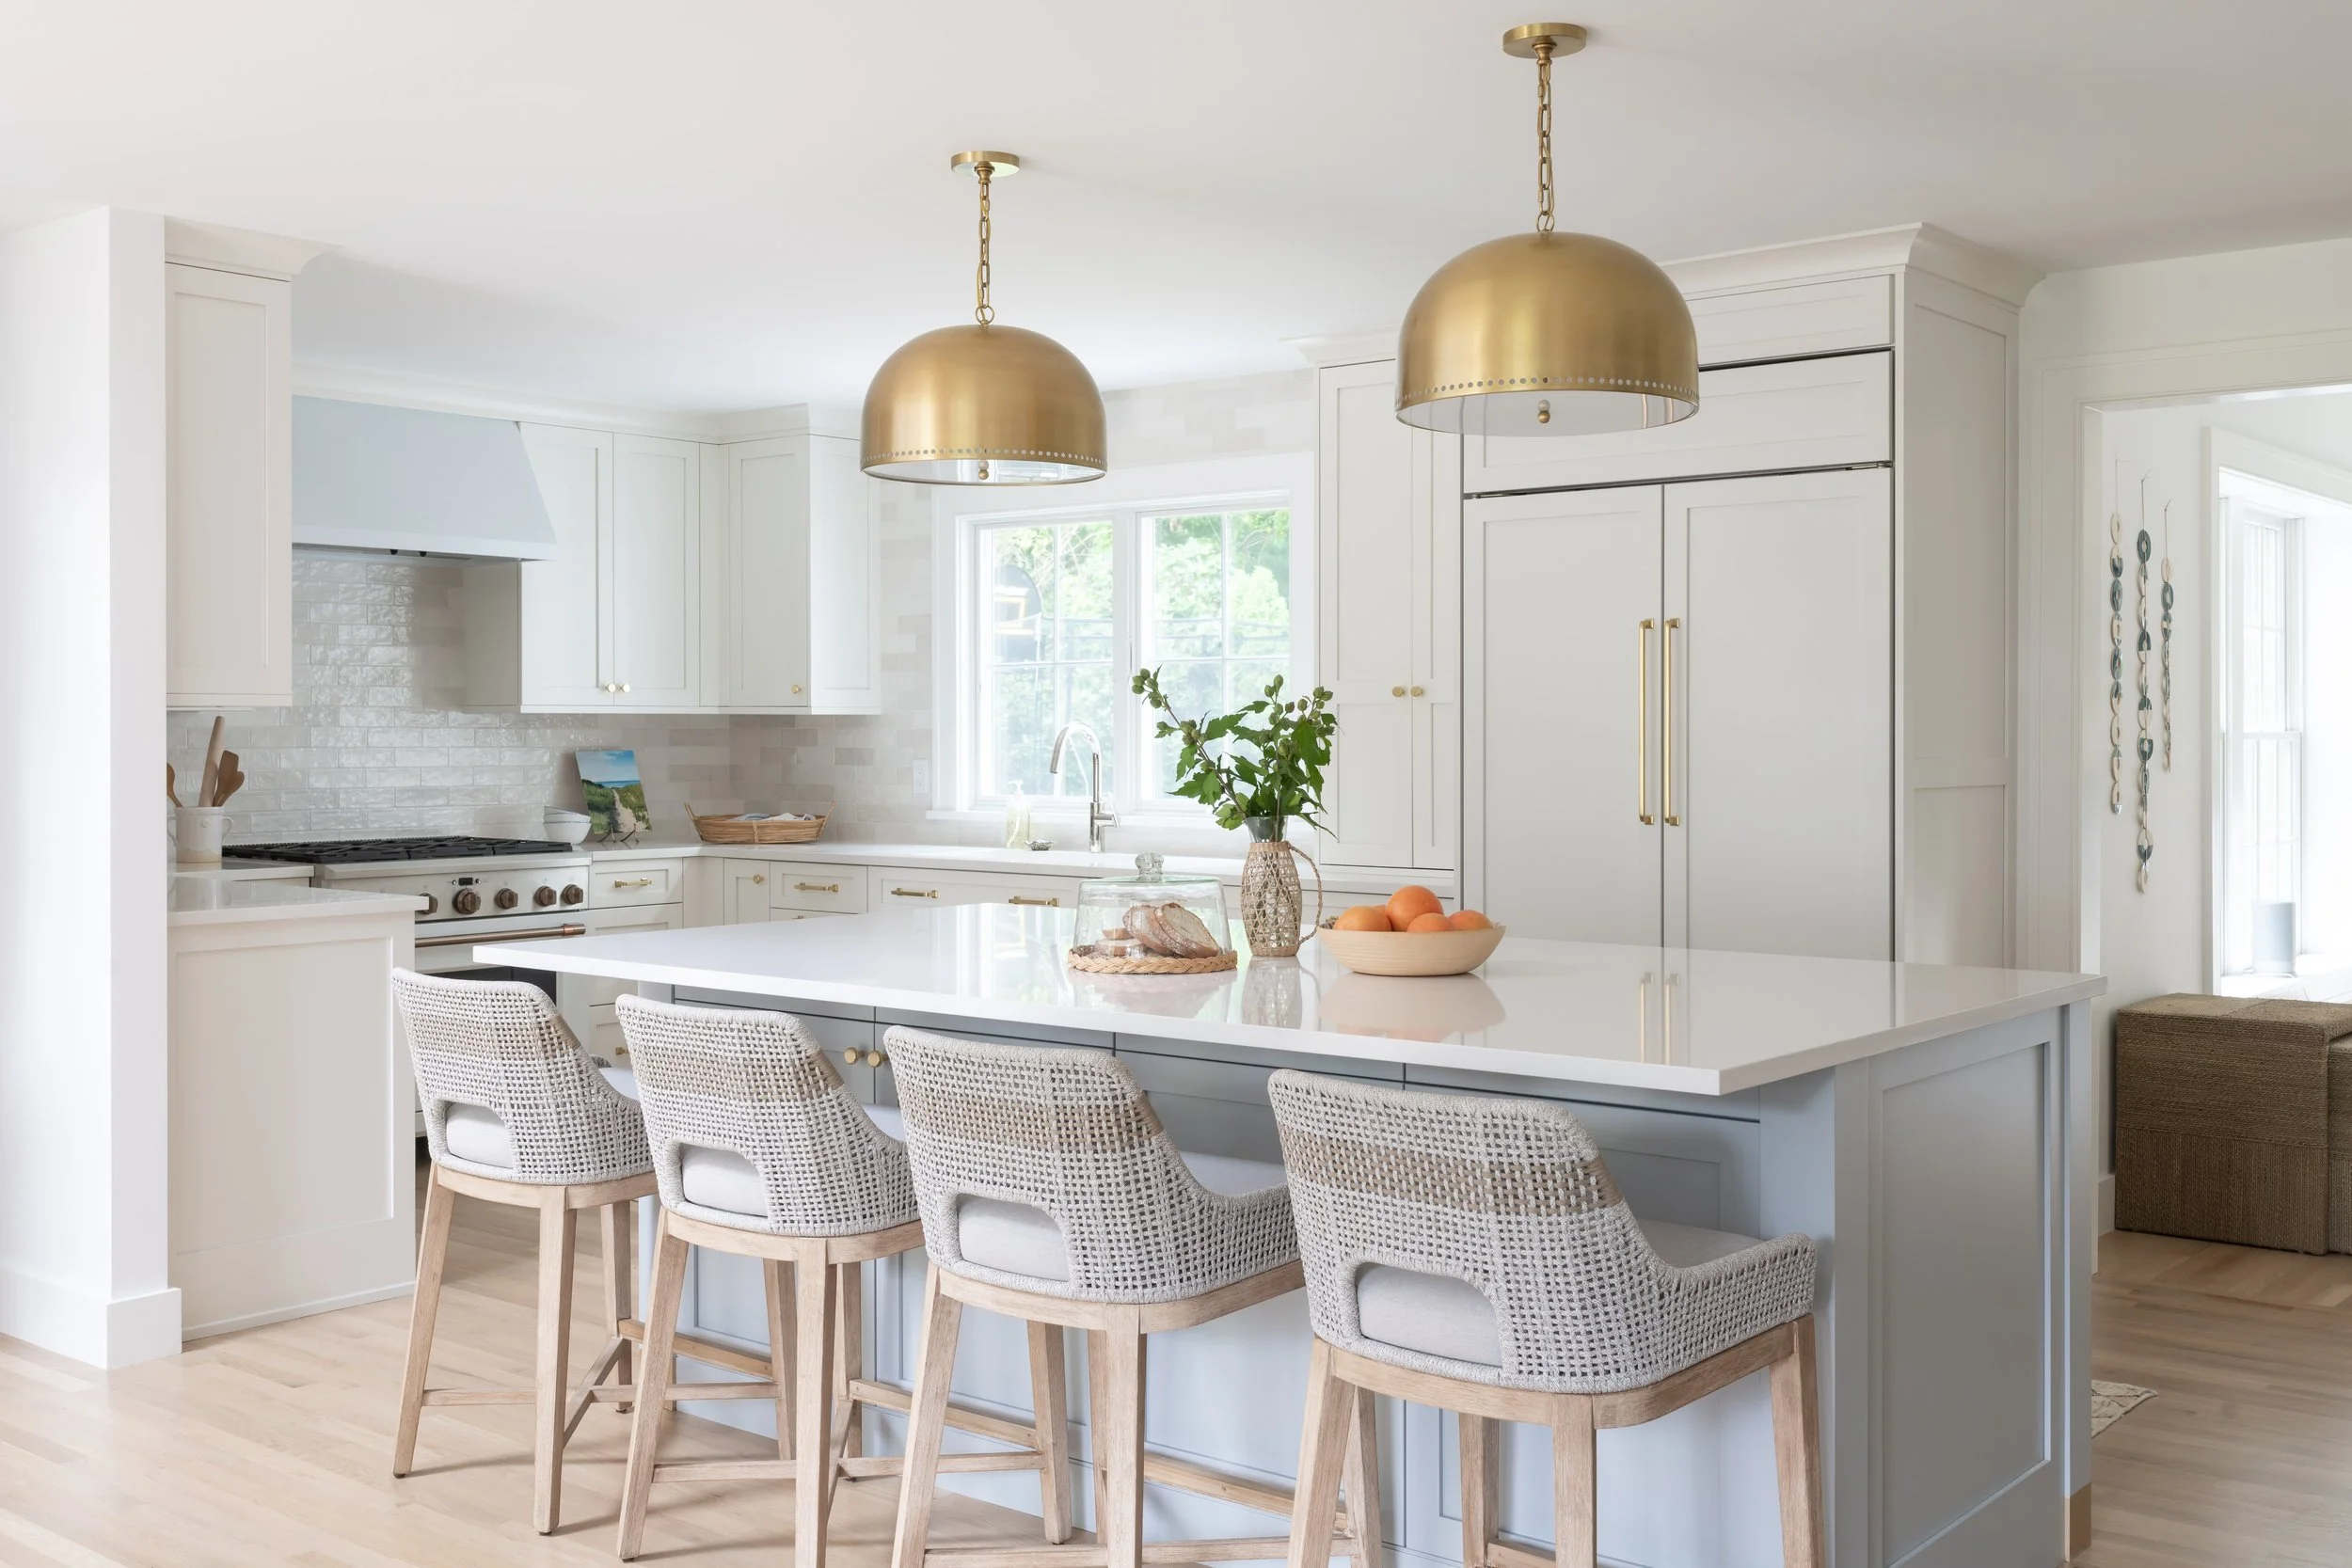
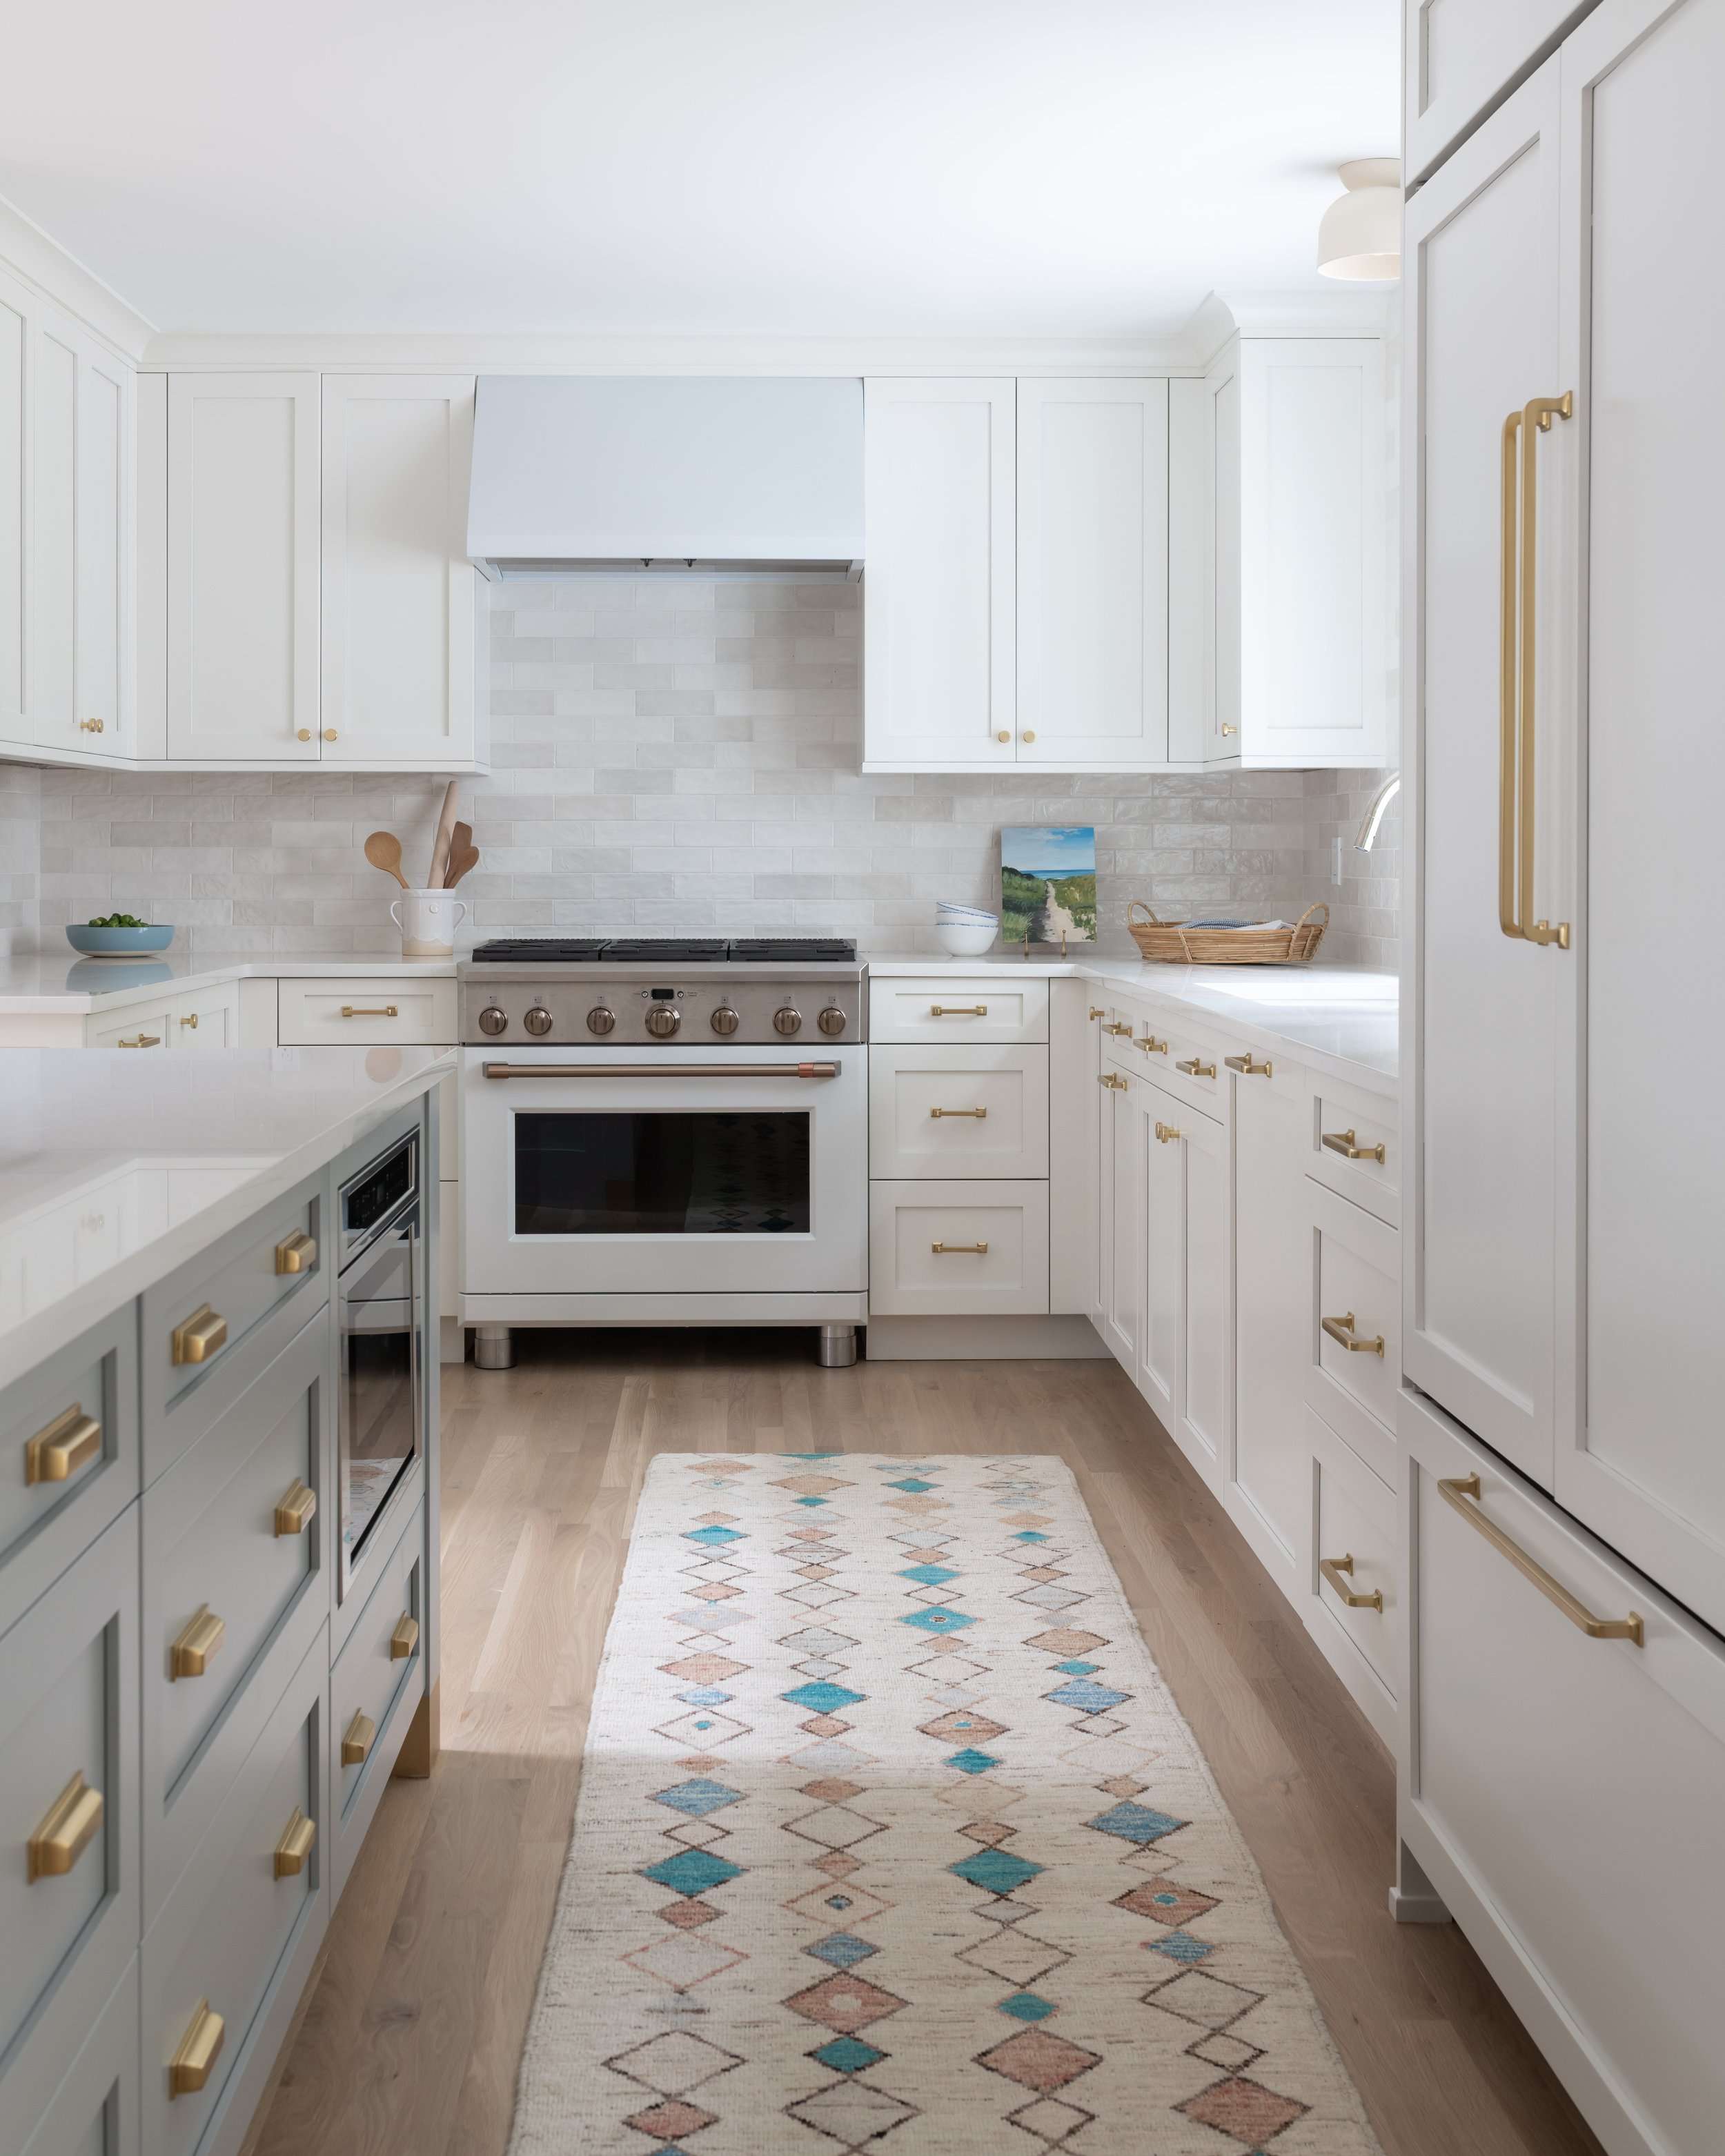
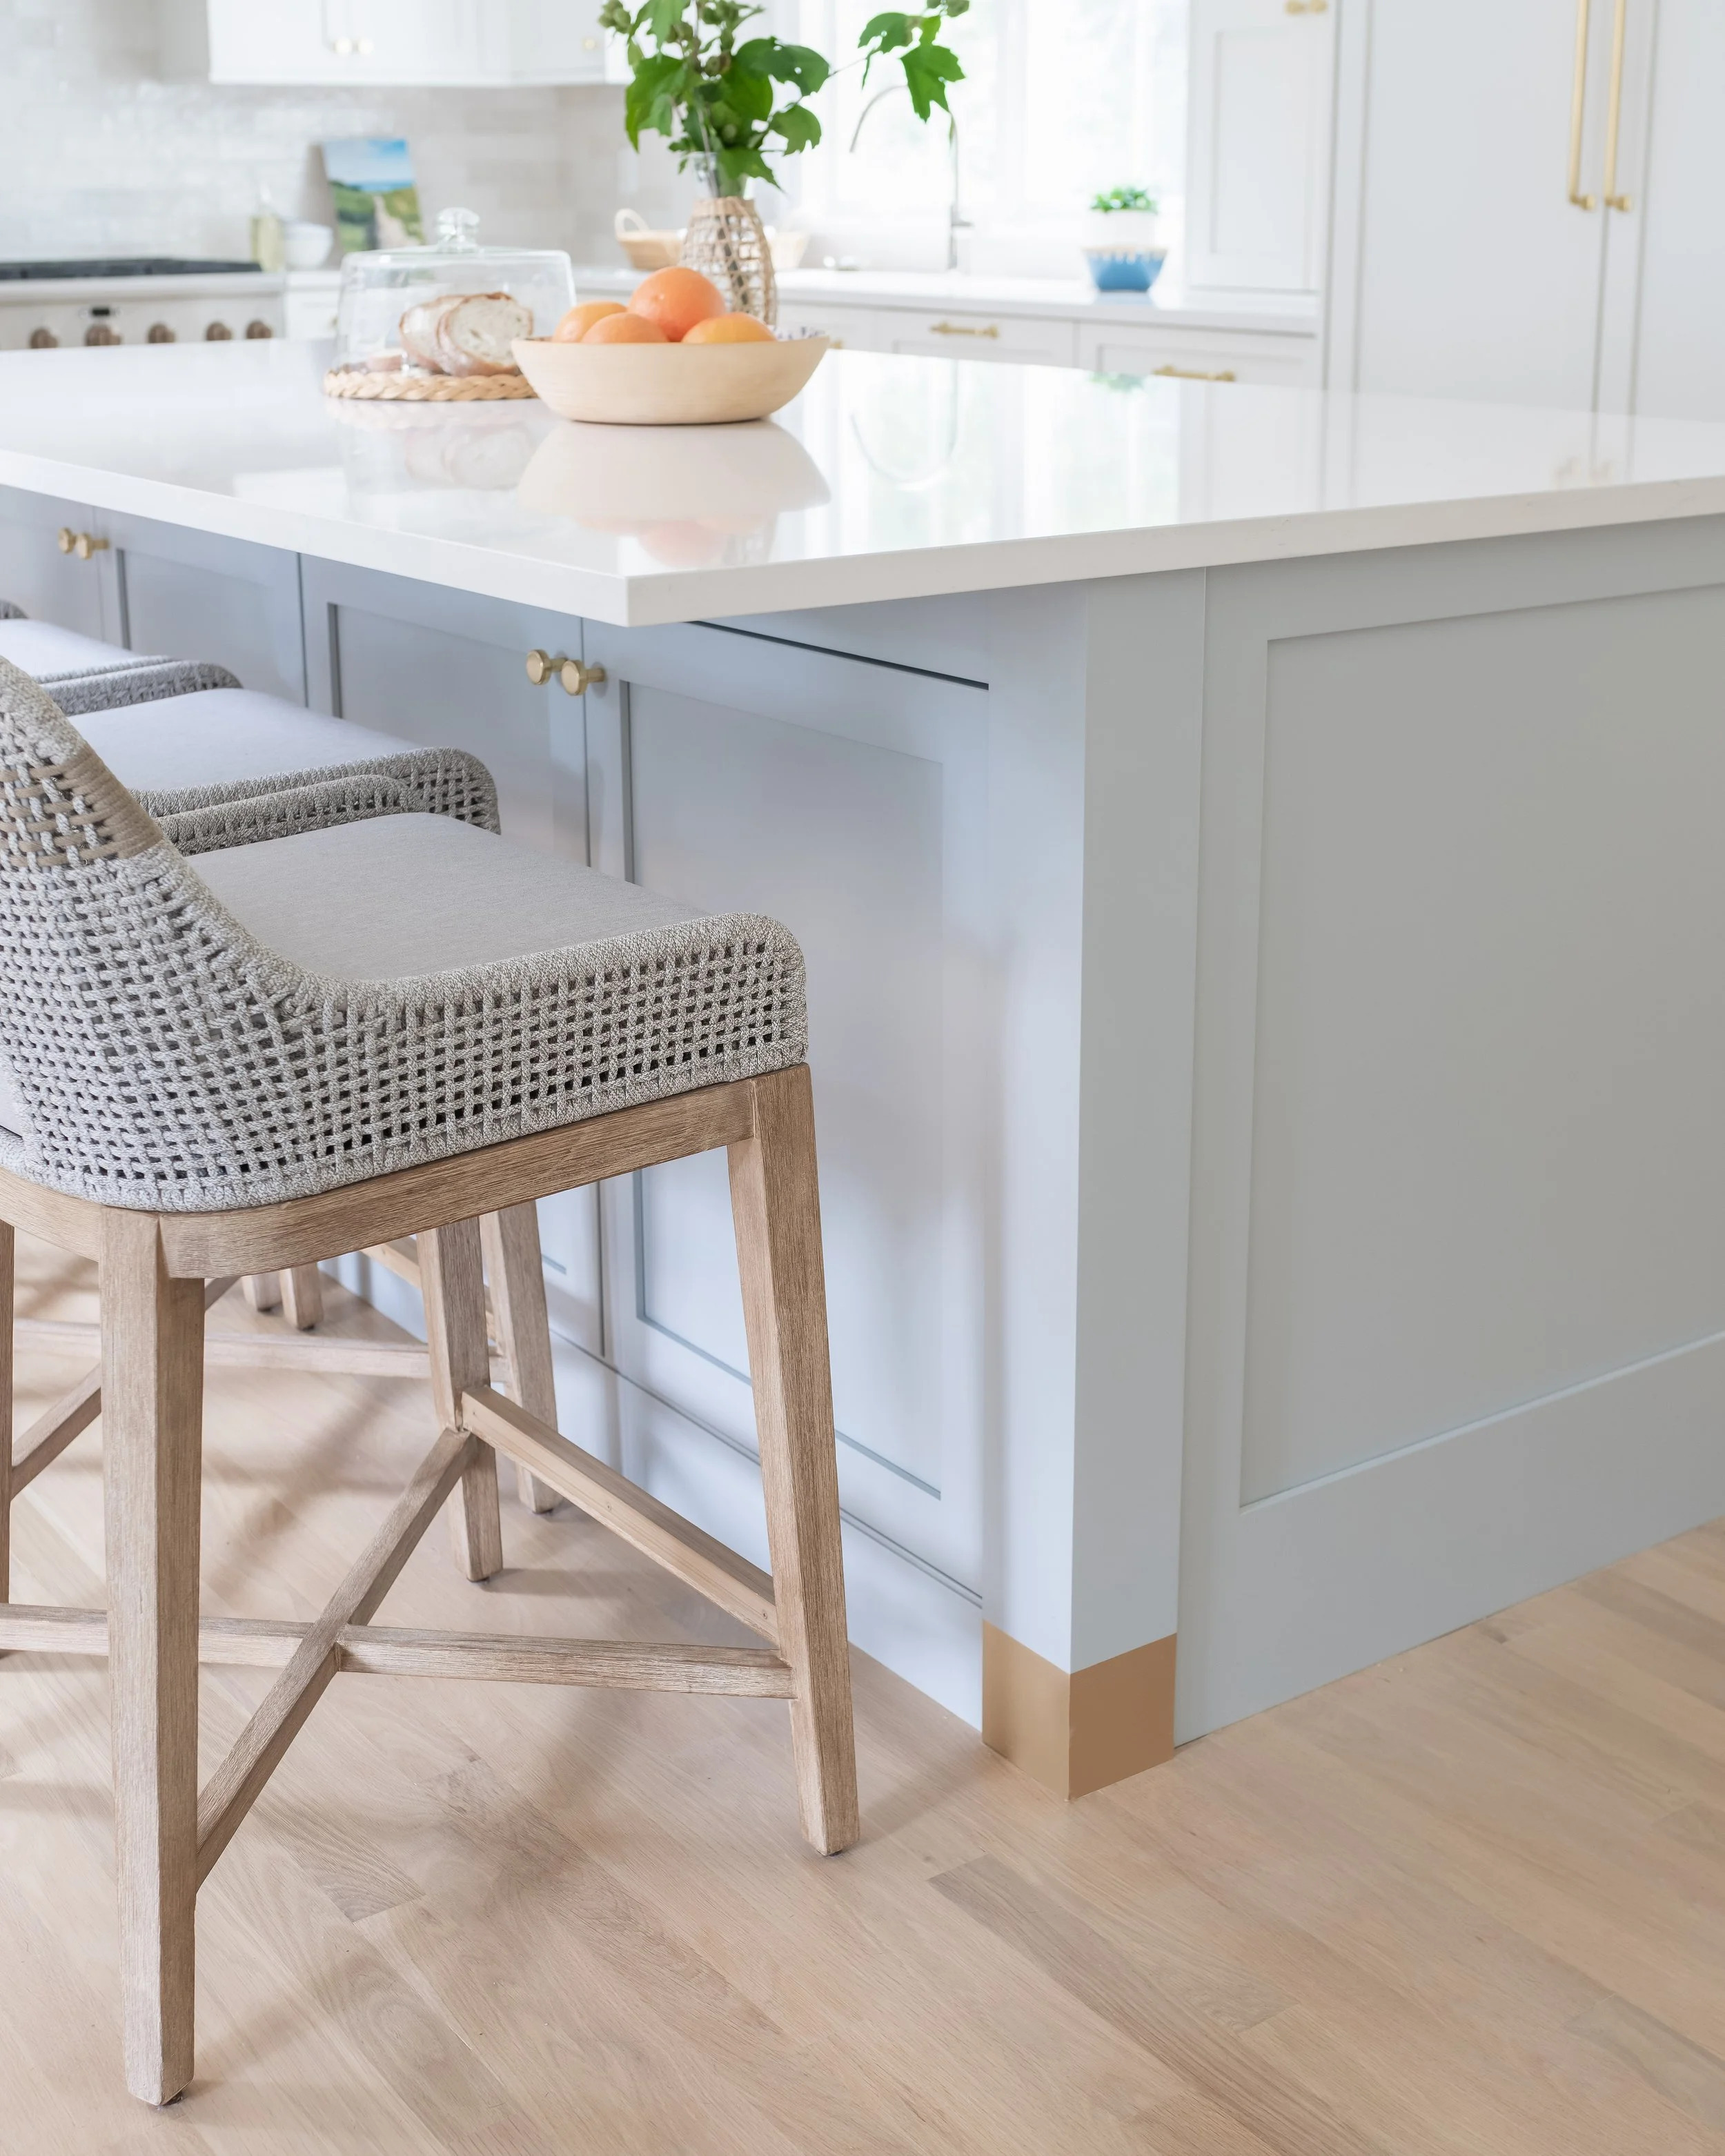
I swear it’s the same house! For the kitchen I chose white cabinetry and a white range and hood. For the island I chose SW Monorail Silver and my favorite detail is the brass caps we added to the legs. I used brass hardware and the backsplash is an inexpensive tile that’s made to look handmade but is actually machine made. I love the differentiation in tones. Now, this is the view from the front door instead of that wall previously.
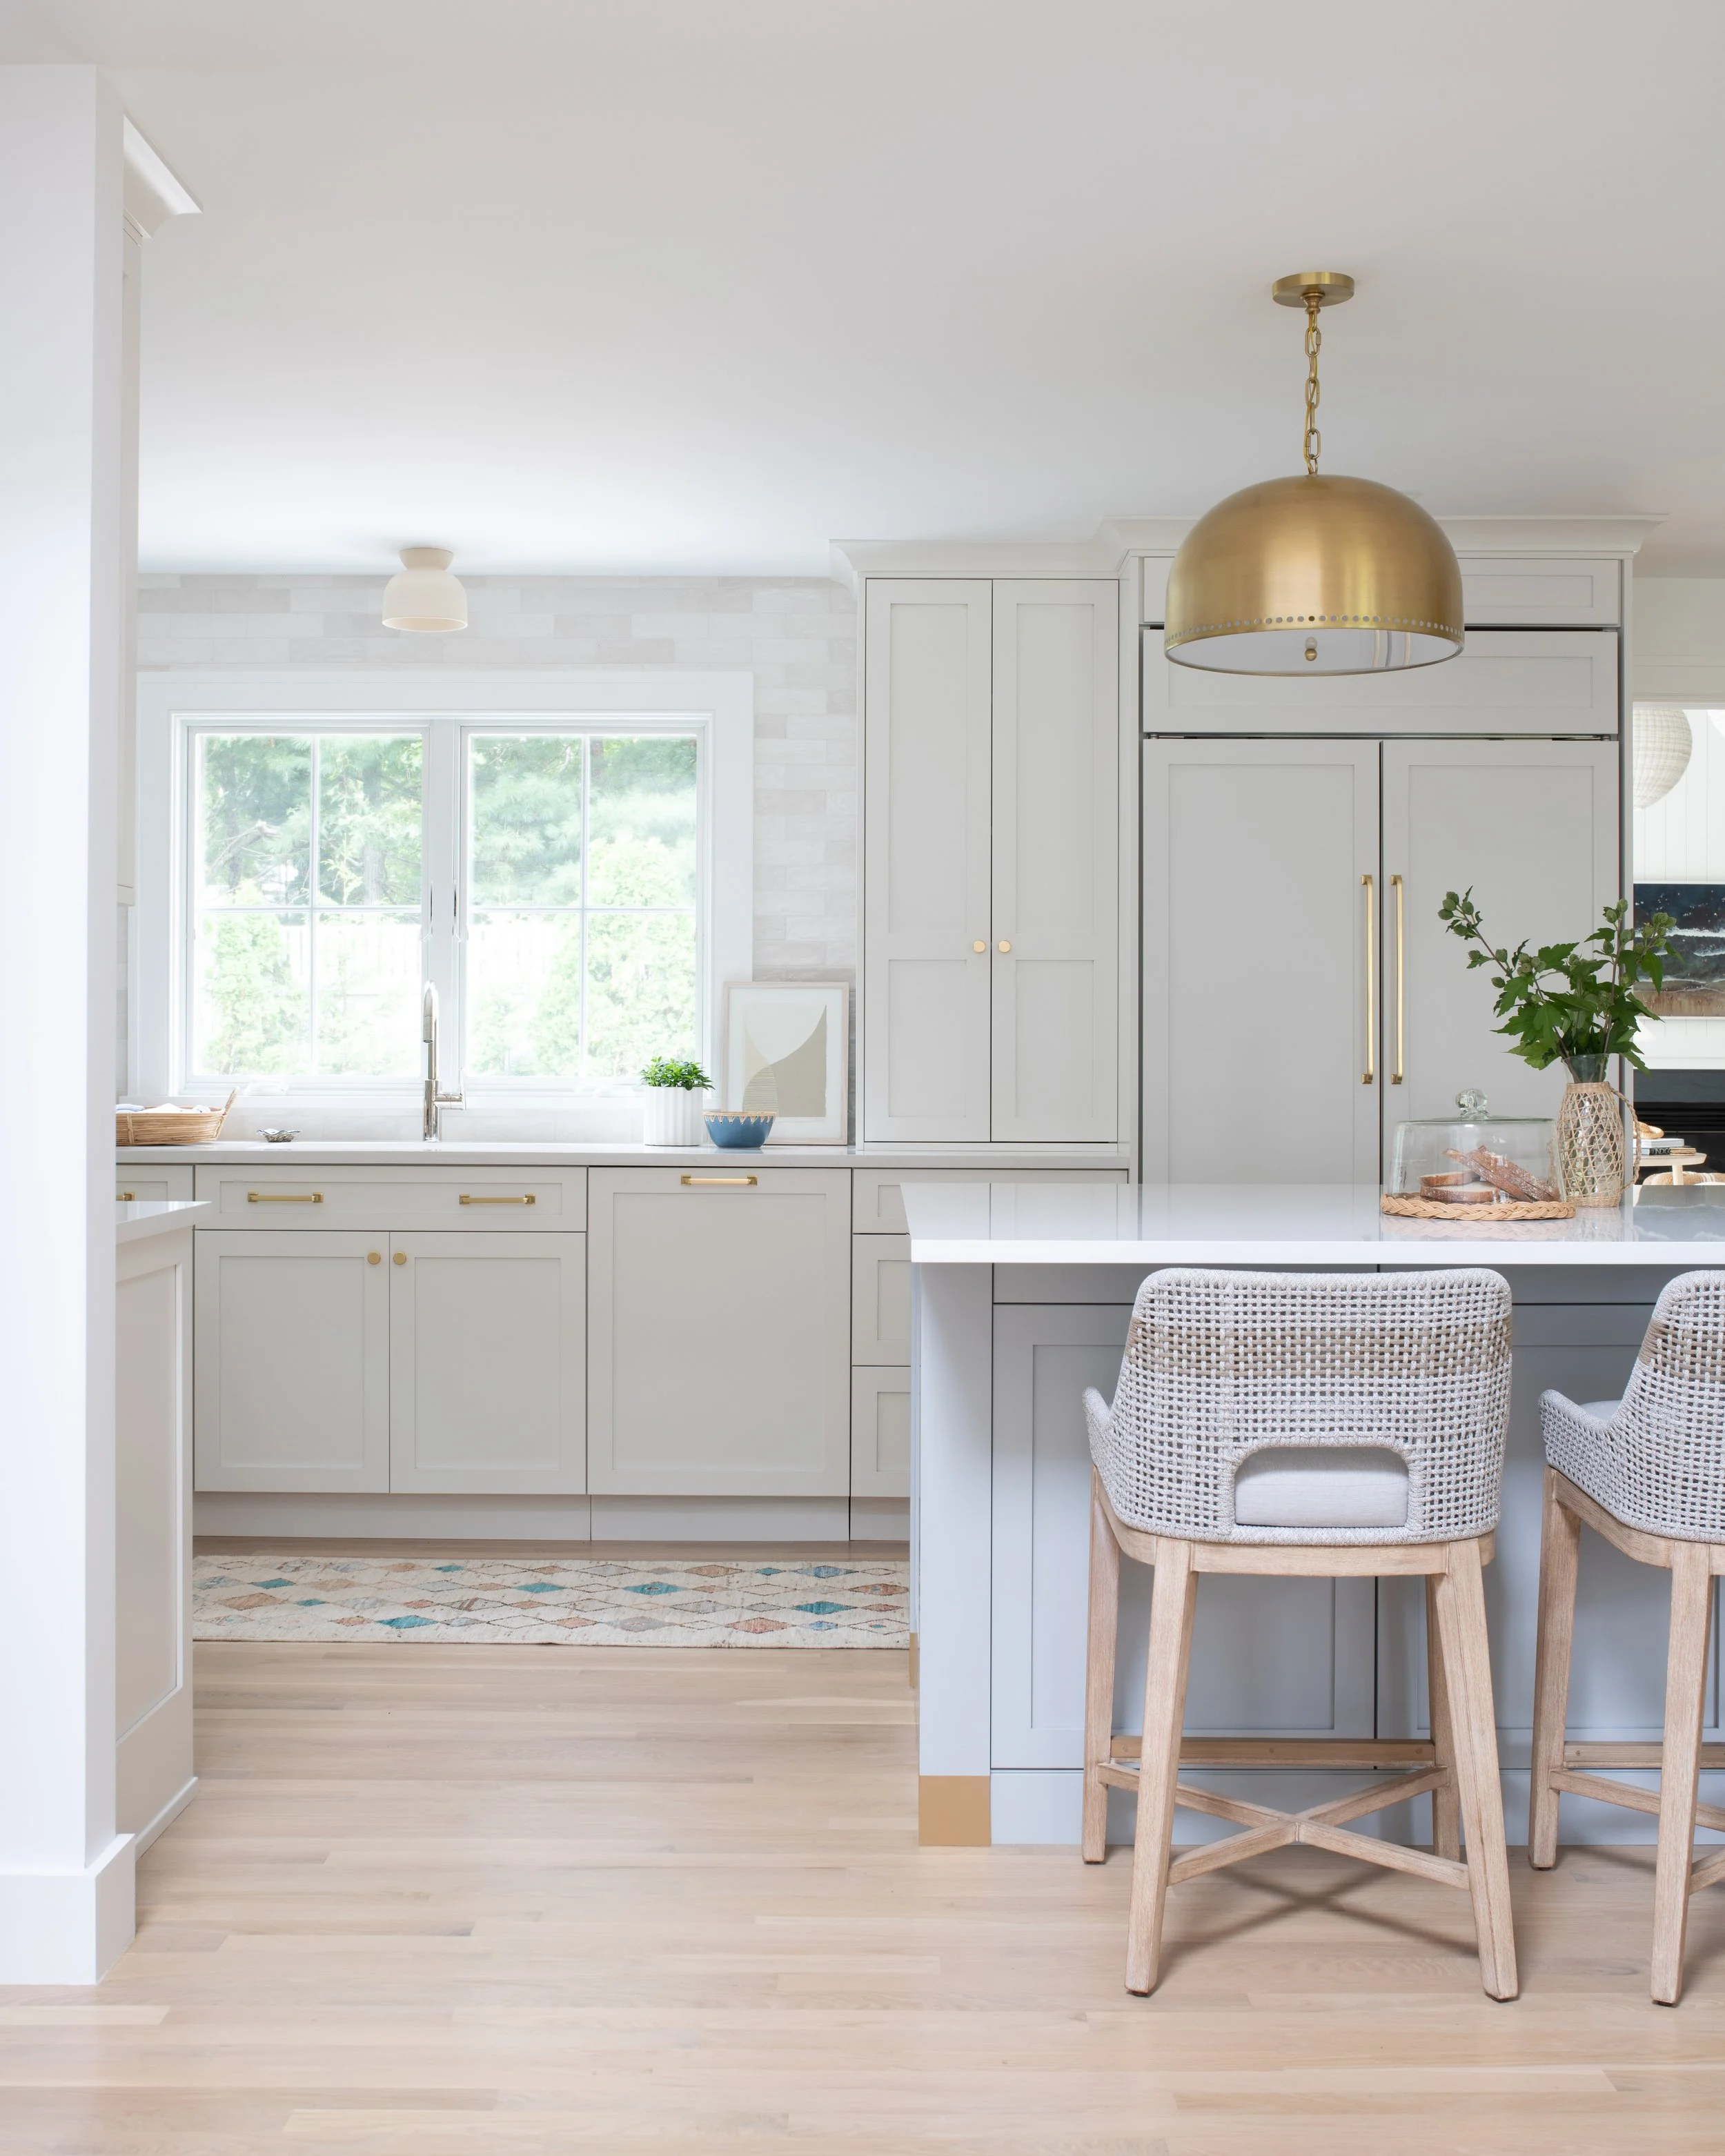
Eventually we’ll add a shade to that window but for now we just are happy that it’s light and bright! I changed up the style of the hardware on the island drawers to add a little personality. The counters are Silestone quartz.
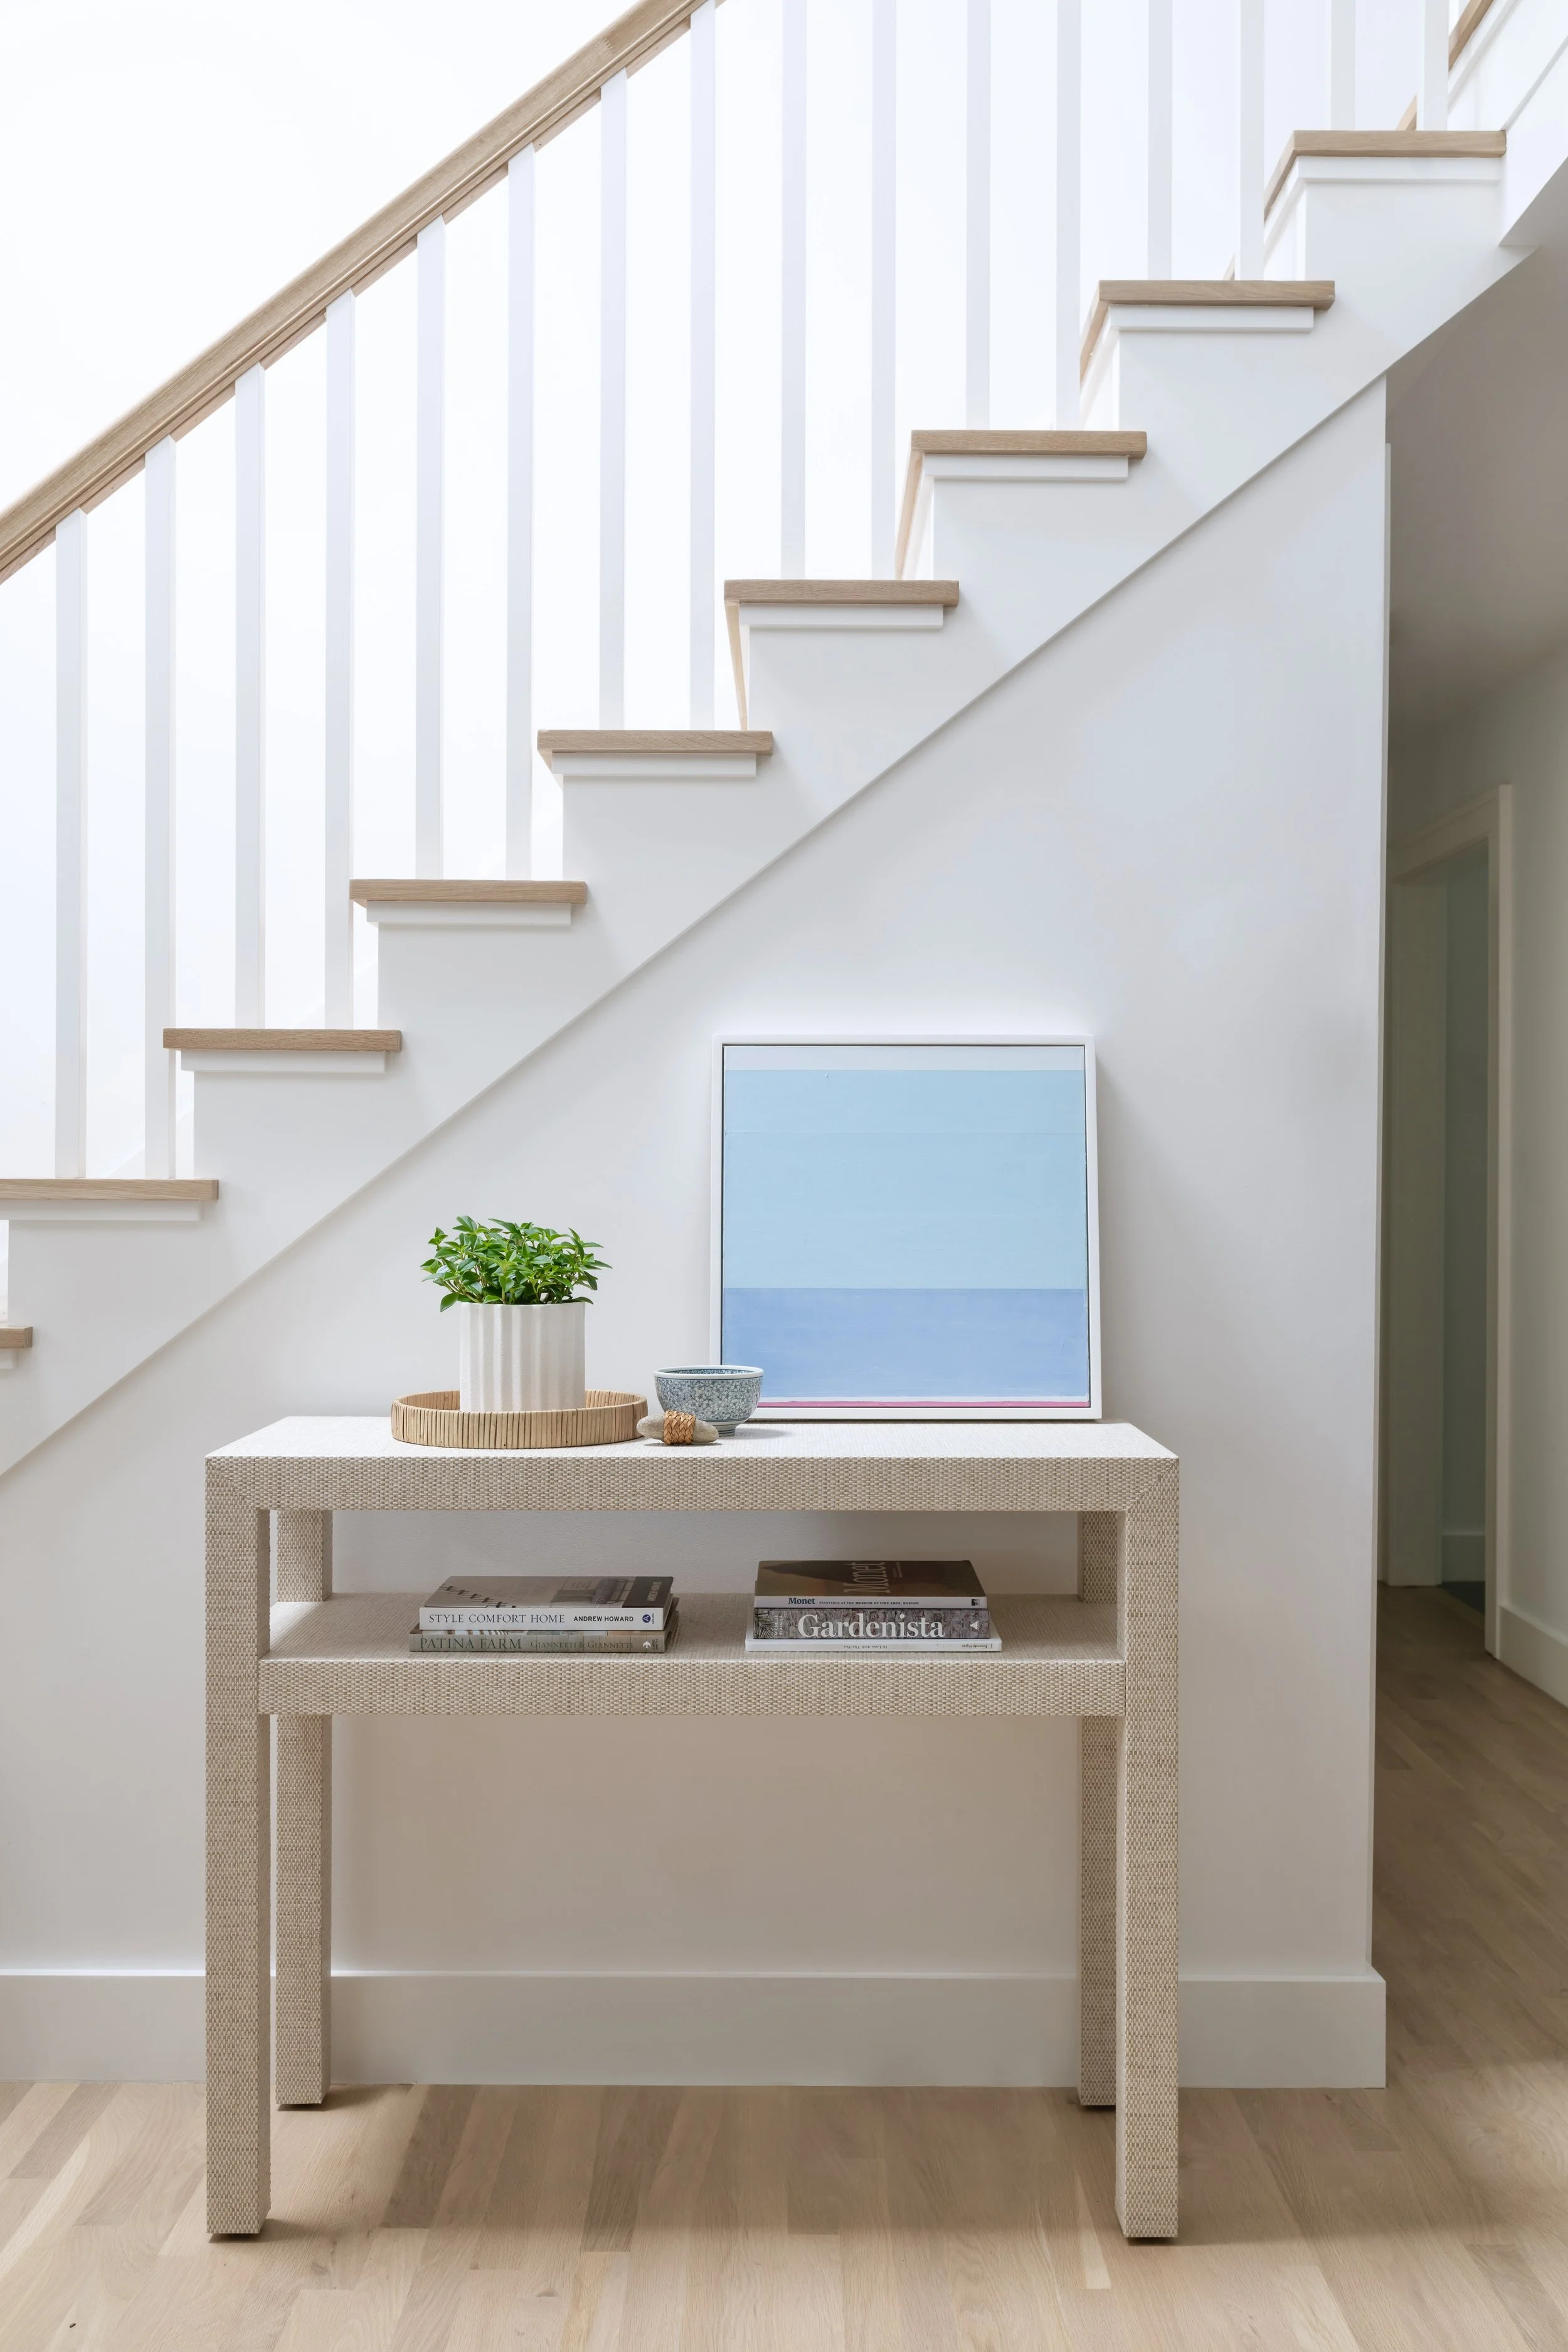
If you’re standing at the island facing the fridge and turn 180 degrees, you’ll be looking at the front living room, front door, and stairs. The biggest transformation here was the stairs. They were SO ugly before - it reminded me of a college dorm room. Also all of the walls in this part of the house were covered with a cream textured wallpaper. Yum. Here are a couple of befores.

This area was mostly cosmetic but we replaced the tile at the front door, added a light fixture to the center of the room, and opened up that stair case with simple balusters and newel posts. Oh and did I mention that we replaced all of the wood floors too? During the process of shoring up the structural pieces, we found that the existing floor wasn’t nailed down to the sub floor and had a little “spring” to it. Securing it would actually be more work than replacing so we matched the existing (and better) flooring in the great room but more on that later.

I think that’s enough for one post - congrats if you made it this far! Next up will be the great room, office, and dining area. I won’t leave you hanging on sources though. Here is everything (hopefully!) you want to know!
Wall and trim paint throughout: BM Chantilly Lace
Floors: white oak with Bona Nordic Seal and a coat of Bona Traffic Natural
Kitchen:
Perimeter cabinets are a factory color but essentially a soft white
Island paint is SW Monorail Silver
Counters are Silestone Eternal Statuario in a honed finish
Backsplash tile is from a local shop
Stools | Pendants | Light above sink | Knobs | Pulls | Bin Pulls (all hardware is aged brass finish)
Living Room:
Sofa | Chairs - Target, discontinued | Side Table | Lamp | Rug | Coffee Table | Light fixture
Entry
Console - generously made by LivenUp Design | Artwork by Laurie Fisher through Libby Sylvia